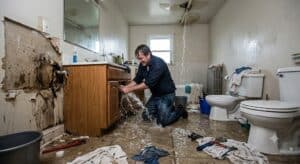
Most homeowners realize where their main water shut-off valve is located only when they urgently need it. Hands trembling, water spreading, cell phone squeezed between an ear and a shoulder, waiting for the plumber to pick up the phone. That’s definitely not the best time to figure it out. The households that exit unscathed from a burst pipe or a broken water heater are those that approached the situation as if it were a fire drill: an exercised response, not a frantic search.
Water damage and freezing account for the second-highest number of claims made to homeowners’ insurance, around 24% of all claims, paying out an average of nearly $11,500 (Insurance Information Institute). This means thousands of households did not react quickly enough or were unaware of what to do when the water began to flow. A good plan will take care of that. Here’s what you need to know to get started.
Find and label your main water shut-off valve
First things first! This is a non-negotiable first step that everyone in the household needs to be aware of. They must be able to locate the main shut-off valve and close it within 30 seconds. The main shut-off is typically located near the water meter; in a basement, garage, or utility room; or outside your home in a warm climate.
Once you’ve located the main shut-off, don’t just leave it at that. Attach a bright tag to the valve, click a picture on your phone, and physically walk everyone through closing the valve. Regular practice is essential in this case because in high-stress situations, people tend to forget even the simplest of things. A burst pipe inside a wall can release dozens of litres of water a minute. Closing the valve in 30 seconds or less can be the difference between a wet patch and half your ceiling on the floor.
Map every fixture shut-off valve too
The main valve is your last resort, not your first move for a localized problem. Under every sink, behind every toilet, and at the washing machine connection, there should be a small angle stop valve. If a supply line under the kitchen sink splits, you want to twist that one valve, not kill water to the entire house while someone showers upstairs.
Walk through your home and check that every one of these valves actually turns. Angle stops that haven’t been touched in a decade sometimes corrode shut, and you don’t want to discover that mid-emergency. If one is stuck, replace it now. It’s a cheap, low-effort fix that pays for itself the first time you need it.
Stop bursts before they start in cold weather
Frosty water lines are among the easiest plumbing catastrophes to prevent, and the priciest when overlooked. Ice demands more room than liquid, so when water in a pipe freezes, the expansion generates enough pressure to rupture copper, PVC, or even cast iron. Most vulnerable are pipes running through unheated attics, crawl spaces, basements, and outside walls with little insulation.
Before the cold arrives, wrap exposed pipes in foam pipe insulation. You’ll save thousands over having to file a water damage claim and go without taps until the plumber can squeeze you in. Cautiously run through the basement, attic, and crawl space searching for uninsulated pipes. Don’t wait until a forecast warns the cold is on its way, as we’ve done too many times.
Don’t forget about pressure: Your water’s coming in under pressure and if it’s more than 60 pounds per square inch, you’re asking for trouble. High pressure can overstress joints, valves, and appliance connections. Most likely, you’ll need a water pressure regulator. For $70, it’s a lot cheaper than fixing the damaging effects of water under too much pressure. A normal household pressure should hold between 40 and 60 psi.
Learn to read the warning signs
Plumbing disasters don’t happen out of the blue. They happen because all the warnings were ignored. Fluctuating water pressure, banging or shuddering pipes (a.k.a. water hammer), discolored water that runs for more than a few seconds, musty odors with no obvious source, a toilet that fills on its own – these are all signs that something’s on the way out.
Treat those as repair triggers, not background noise. A running toilet will waste thousands of liters and lead to a failing flapper or fill valve, easy to replace now, expensive to delay. Damp drywall or a spongy spot of flooring near a bathroom is virtually never an aesthetic issue. It’s water you can’t see finding its way in over time.
Luckily, smart leak detectors have made this part of the drill a lot easier. Wi-Fi-connected sensors and automatic shut-off systems like Flo, Phyn, or Moen will catch that slow leak behind the wall or under the slab long before it becomes a five-figure claim. They’re no substitute for your valve knowledge, but in exchange for a few hundred bucks, they’ll often end up saving you a heck of a hassle.
Build a stop-the-bleed kit
Instead of keeping these tools scattered in different places, you should store them together in a dedicated box. These are the tools you’d need during the first ten minutes of a leak: a bucket, an adjustable pipe wrench, plumber’s tape, a rubber pipe repair clamp, a stack of heavy towels, and a wet/dry vacuum. Having these tools does not eliminate the need for a professional repair, but they will help you buy some time and prevent excessive water damage to flooring, drywall, and subfloor while you wait for the professional to arrive.
The rubber repair clamp is especially useful as it costs just a few dollars. If you wrap it tightly around a split section of the pipe, it can reduce the leak from a gush to a drip, which can make a huge difference for when your professional emergency plumber Sydney arrives to help.
Know where DIY ends and licensed help begins
It’s best to be prepared for common plumbing problems, because very often when they occur you’ll need to act quickly. You don’t want to be figuring out your limits when there’s an inch of water on the floor. Simple repairs that most homeowners can make include closing valves, using a plunger to unblock a toilet, or using tape or a clamp to patch a small leak.
On the other hand, if a pipe has burst inside a wall, you need to do anything with a gas water heater, you have a sewer backup, or the leak is near wiring or electrical outlets you should call a professional immediately. Sewer backups are particularly dangerous because this water is contaminated and can pose a health risk. Only a licensed professional should deal with raw sewage water and the cleanup involved requires biohazard expertise in most cases.
Pre-screen your professional response team
This is the step most households skip, and it’s the one that costs the most time when it matters. Don’t wait until water is pooling on the kitchen floor to start googling “plumber near me” and comparing reviews. Vet someone now. Look for a licensed, insured operation that runs a genuine 24-hour service, has a published response-time guarantee, and is upfront about pricing rather than vague about it over the phone.
Save that number in your phone, and put it somewhere physical too, like a card on the fridge, in case a phone is dead or wet. The whole point of this step is that the decision gets made calmly, in advance, rather than under pressure with three companies on hold at once.
Document everything for insurance
After ensuring that the situation with water is in order, you must begin with the documentation. Take photos and videos of the damage with a timestamp before you touch anything or start the drying process. Save all receipts for emergency purchases, whether it is from a hardware store for a repair clamp, or an invoice from the plumber.
This is important because insurance companies make a clear distinction between sudden, accidental damage, and gradual seepage. A burst supply line is generally covered by insurance. A slow leak that dripped behind a wall for six months, causing gradual damage that no one knew of, often isn’t. The fine print in homeowners insurance states this, and the kind of documentation that you have is what swings your claim to one side of the line or the other.
Plan for the damage you can’t see yet
Water often doesn’t remain in one place. As soon as you notice a leak, remove any important items and electronics from the floor. If water gets close to outlets or switches, turn off the power from the breaker first and do not attempt to save objects. Start the wet/dry vacuum or fans when safe, and install a dehumidifier within 1 to 2 days. Mold grows quickly and the insurance company won’t wait for you to protect your property from further damage, wherever feasible.
When it comes to major structural drying projects, dealing with that process is left to the IICRC-certified specialists in water damage restoration who can come in to ensure that everything is dry like it should be. It may involve removing carpets, drywall, or baseboards to do it properly, and it is way faster to remove a bit extra than come back to the scene of the crime because enough wasn’t lifted during the first drying pass.
If your basement is prone to flooding, a sump pump with a battery backup is worth having. Most plumbing-related flooding happens during storms, which is precisely when the power tends to drop. A sump pump that only works with mains power is a sump pump that fails you exactly when you need it.
Retire your weakest components on a schedule
The best emergency plan is the one you never have to use. Washing machine supply hoses are a leading cause of sudden residential flooding, and the fix is simple: swap the rubber ones for steel-braided hoses and replace them every five years regardless of how they look. Flush your water heater annually to clear sediment, and test the TPR valve twice a year, since sediment buildup and a failed relief valve are the two most common reasons tanks rupture. It’s also worth checking backflow prevention devices periodically if your home has them, since a pressure drop in the main line can otherwise pull contaminated water back into your potable supply.
None of these take more than a few minutes each, and they quietly close off the most common paths to a five-figure claim.
A plumbing emergency isn’t really about the water. It’s about the ten minutes before anyone acts. Households that rehearse the sequence – valve, assessment, containment, documentation, professional – consistently walk away with a smaller repair bill and a shorter recovery than the ones improvising it for the first time while the carpet floods.